- Interior & comfort
- Be the first to comment!
- Read 11103 times
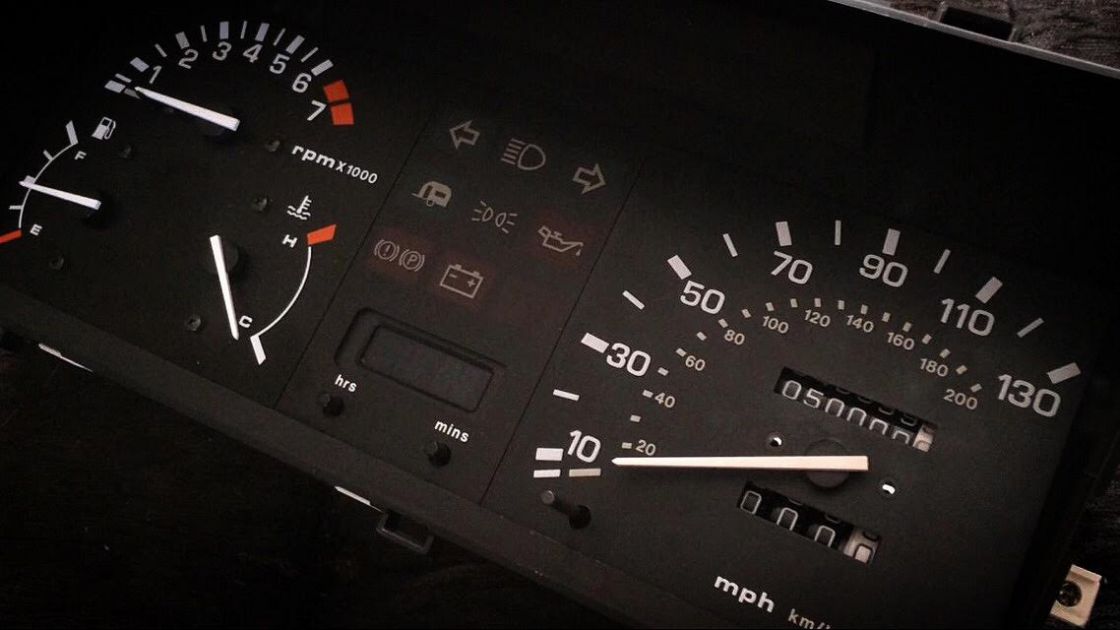
Rev counter
This is a great upgrade for any Rover Metro Mk3 without a rev counter.
Very similar fitment for Rover 100's and Mk2 & Mk3 Metros
If your Rover Metro MK3 K series was fitted with a rear window wiper but didn't have the Rev counter the wire for it will already be installed in the dash wiring loom and your new dash will fit in plug and play as a straight swap. If not you will have to run a wire from the coil.
Parts required
- Complete rev counter dash from a mk3 Metro
- Phillips screw driver
- Short stubby Phillips screw driver
Fitting steps
- First step is to remove the dash surround which is held in by 5 Phillips screws. I have highlighted the locations with white circles. Makes sure you put these screws in a safe place to use for re-fitment.

- Next step is to remove the dash. The dash is held in by 4 screws. 2 silver screws at each end of the dash. Now the dash will be lose. Tilt it forward to gain a bit of access to the 2 wiring loom connectors and squeeze both ends and push of for each but don't tilt it to much because the speedo cable is easily damaged which will leed to a bouncing speedo needle.
- Now disconnecting the speedo cable itself. This is the hardest bit of the upgrade. Remove the fuse box cover and reach your hand up to behind the dash where the speedo cable joins the speedo. Squeeze the thin bits on the connector and pull at the same time to release.
- The dash now is totally lose, but wont fit out of the gap so you will need to remove the clear and black plastic protective cover which connects on to the white bit of the dash. This has 3 clips at the top and bottom of the dash which are easily accessible to remove the clear plastic bit of the dash and remove both in 2 parts.


- Next step to retain original mileage its best to swap your original speedo in to your new dash with Rev counter. This bit is very simple. Just remove the 2 screws the red arrows point to on both dash's and swap them over.

- Sadly most Rover 100s and some base 1.1 Metro's that don't have the rev counter as standard don't have the wire fitted either. You will need to add your own single wire from the back of the dials. Its the white connector as pictured, end pin. It opens up the with a small screw driver can push the metal clip in on the top of the metal connector and remove the wire itself from the white block with out damage and add to your white connector).
If you wish to purchase the correct connector they're called Lucas Rist Flag Terminals and can be purchased online via suppliers such as Automotive Connectors Ltd (also available via their eBay Shop) https://www.automotiveconnectors.com/lucas-rists-flag-terminal-female-11-20-mm.html - Then the other end of the wire to the Negative on the coil as circled in red in the picture below.
Refitting, this is the reversal of the removing but its best to check your dash works by connecting up the wires first to check all lights, clock and gauges work before re-fitment and remember to reconnect the speedo cable.

Then when finished enjoy your new dash.
Additional Information
Rover 100 MPi (Multi Point Injection) models coil location and wiring varies slightly to early 100 and Metro models. Please find wiring Diagram submitted by TonyB on link below (click image to enlarge)
Illumination
This picture below shows the illumination of the rev counter dials and 130/150 mph speedo. These are back lit as standard and the one pictured have had the two down lighter bulbs changed to green LEDs. The 110mph non rev counter dials only have 2 down lighter bulbs and a bulb for the mileage and are not back lit.


