- Exterior & styling
- Be the first to comment!
- Read 3454 times
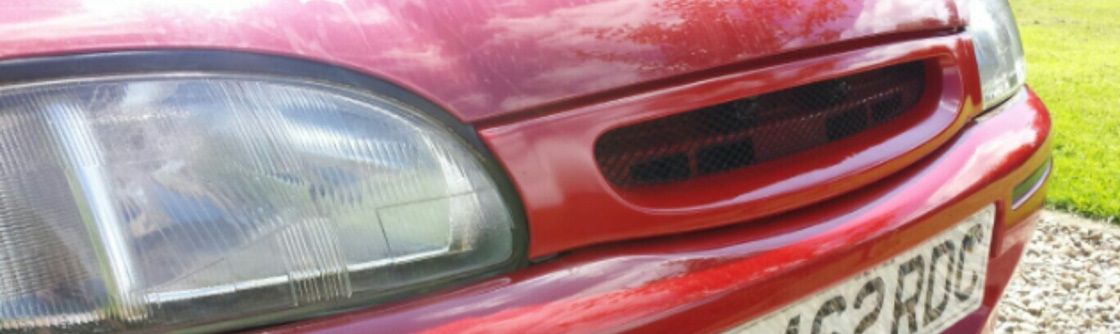
Debadged front grille
How to debadge your Rover 100 front grille.
44Difficulty3Tools required7Time required3Price
Parts required
- Grille
- Hacksaw
- Variety of files
- Filler
- Plastic primer
- Glue
- Paint
- Wet and Dry \ Sandpaper
- Metal strip
- Aluminium mesh or fibreglass
- Time and patience!
Fitting steps
- To remove your grille use a cross head screwdriver and unscrew the two far screws that go into the headlights and the two in the middle of the bumper.

- Remember to refit these two screws because they hold the bumper on as well as the grille. You could also get a spare grille and use that which is what I did.
- Before you start attacking your grille, I'd suggest you remove your badge. Prise it off where pictured, being careful not to damage the badge.
- Then remove the black plastic inserts by taking the clips off the back. This would allow you to use the badge for something later or to sell.
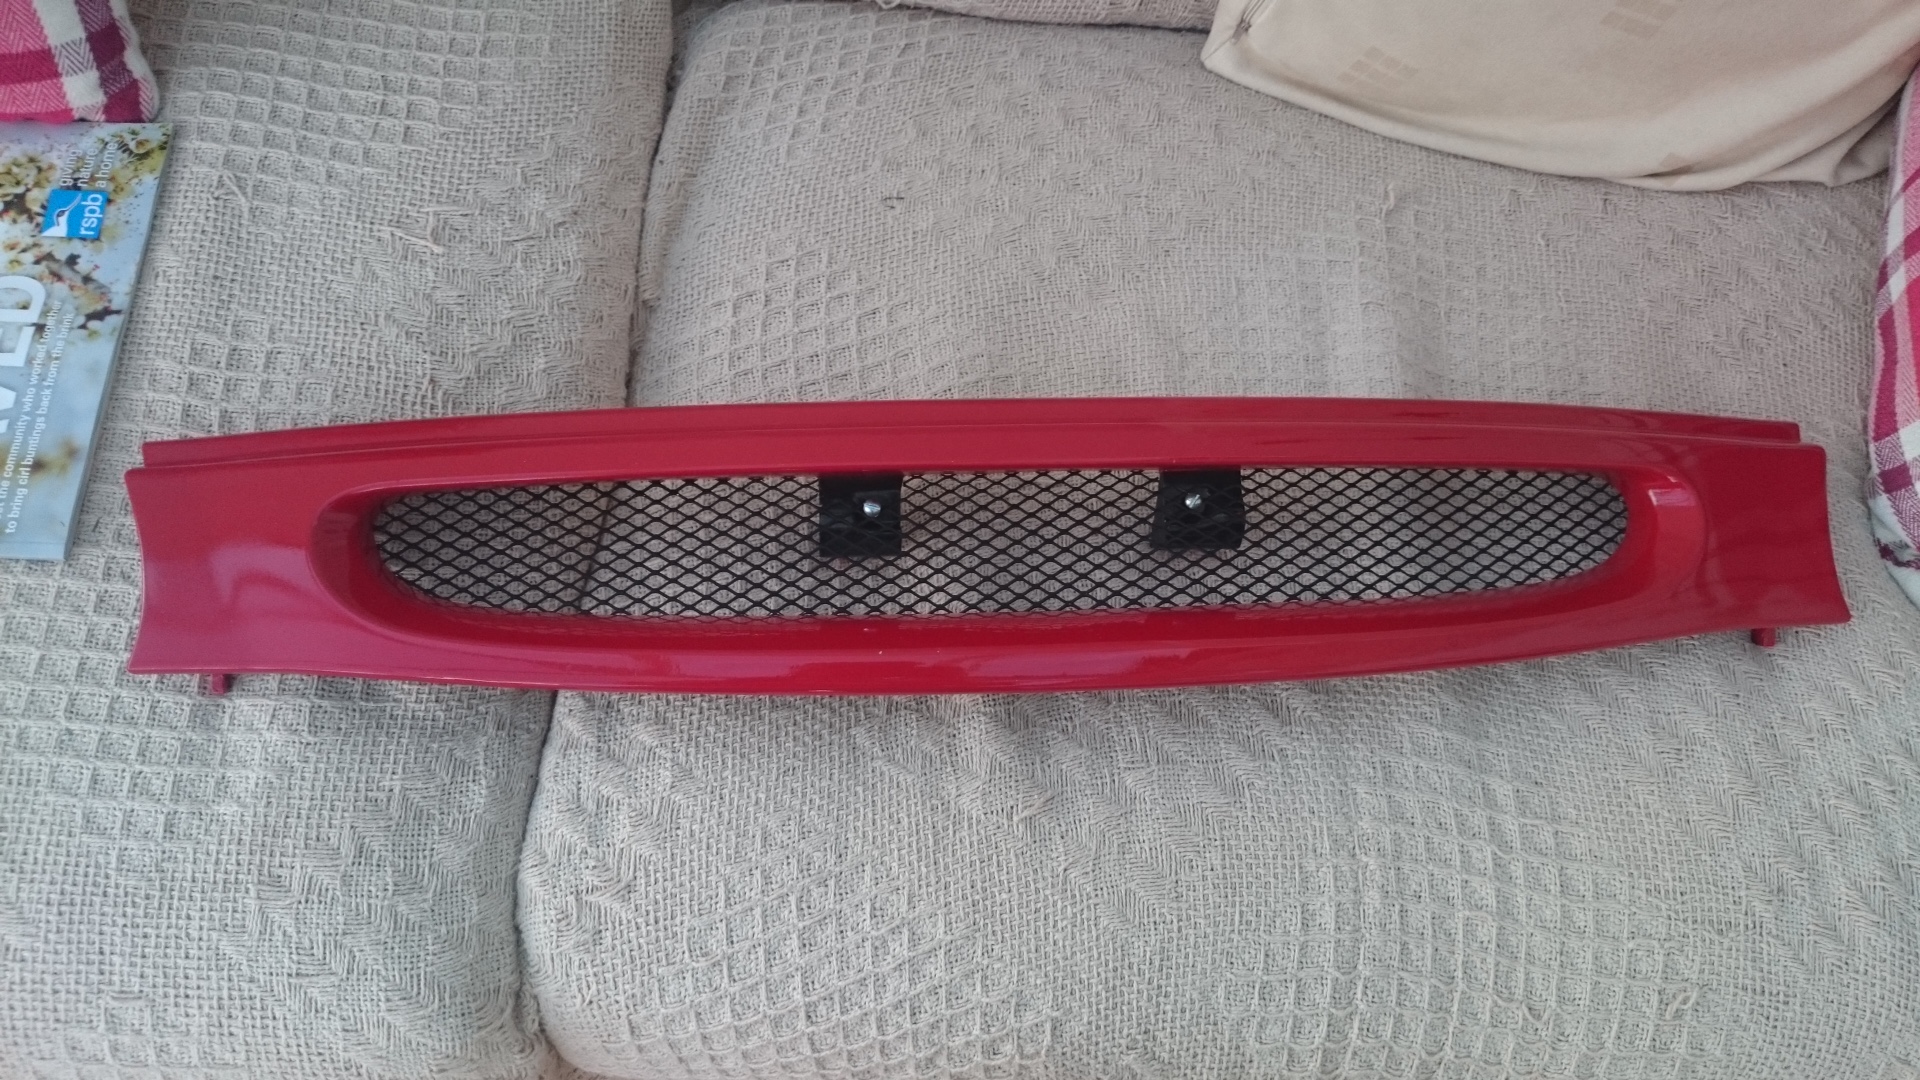
- Cut out the centre and the two far supports with a hacksaw, then use a variety of files to tidy up where you cut and to remove the small angled plastic lip around the whole back of the grille. I'd suggest not to remove the mounting clips (circled).
- Now get your metal strip and measure it up against the gaps in the grille with enough extra on ether side for you to glue it, this helps support the mesh or fibreglass. This strip also reinforces the grille which is needed because you have just cut all the strength out of it.
- I used Araldite Rapid two part glue to attach the strip to the grille (I took the top strip to the far edges of the mounting clips).
- Once the filler is applied, sand/wet and dry it down with a block. This helps the filler become perfectly flat and not have high and low spots.
- Once the filler becomes flat go over the whole thing without the block so you can get into the corners and angles.
- Paint the grille.
- Measure and cut some mesh - remember to notch it out if you've left the mounting clips (leave enough so you can put a bit if it in front of the clips for a bolt.) Make the mesh wider so you can fold it around.
- Fold the mesh around and hold it in place with bolts through the mounting clips.
- Fold the excess around and tack into place with a hot glue gun.
- Refit the grille and enjoy!


Guide submitted by Sam Jaggard.